Using Firebase, I made ‘Like Button’ in my static jekyll blog!
- Need
- Strategy
- Step by step
- Conclusion
- Reference
Need
Since my Jekyll blog is not only a record of my studies but also of my daily life, some viewers may not have a GitHub account to use the Giscus comment service for interaction. Other social media platforms, such as Instagram, Twitter (I refuse to call it X, lol), and Facebook have a ‘like’ button. Viewers can click on the like button to positively interact with authors and creators. I want this feature in my blog so that passing by readers can simply click on the heart-shape like button without logging into Github.
Strategy
Since Jekyll and github page is for static website, client cannot send info to server and receive info from server. Firebase can do this part of the job, so that static page can have some dynamic features. The problem is, I have no experience with Firebase and only know basic javascript and CSS. Here, all the code, except for the button styling and animation was generated by Google Gemini. I only made slight modifications and merged the fireBase client javascript and button animation javascript into one file, fireBase.js. Although I cannot write code, I can read the code and grasp what are the scripts doing :)
The method I used here may not be safe for actual release, as client can read and write the Firebase-Firestore database directly. This issue must be resolved beforehand.
What is Firebase?
Firebase is a back-end computing service for mobile and web application. It offers several applications, such as Authentication for account management, Firestore database for database management, Functions for back-end function computation. Since Jekyll is a static website without backend component, we will use Firestore database for storing the number of Like.
Step by step
1. Firebase settings
1-1. Create you Firebase account and then log in.
1-2. Create Firebase project.
1-3. Create Firestore database
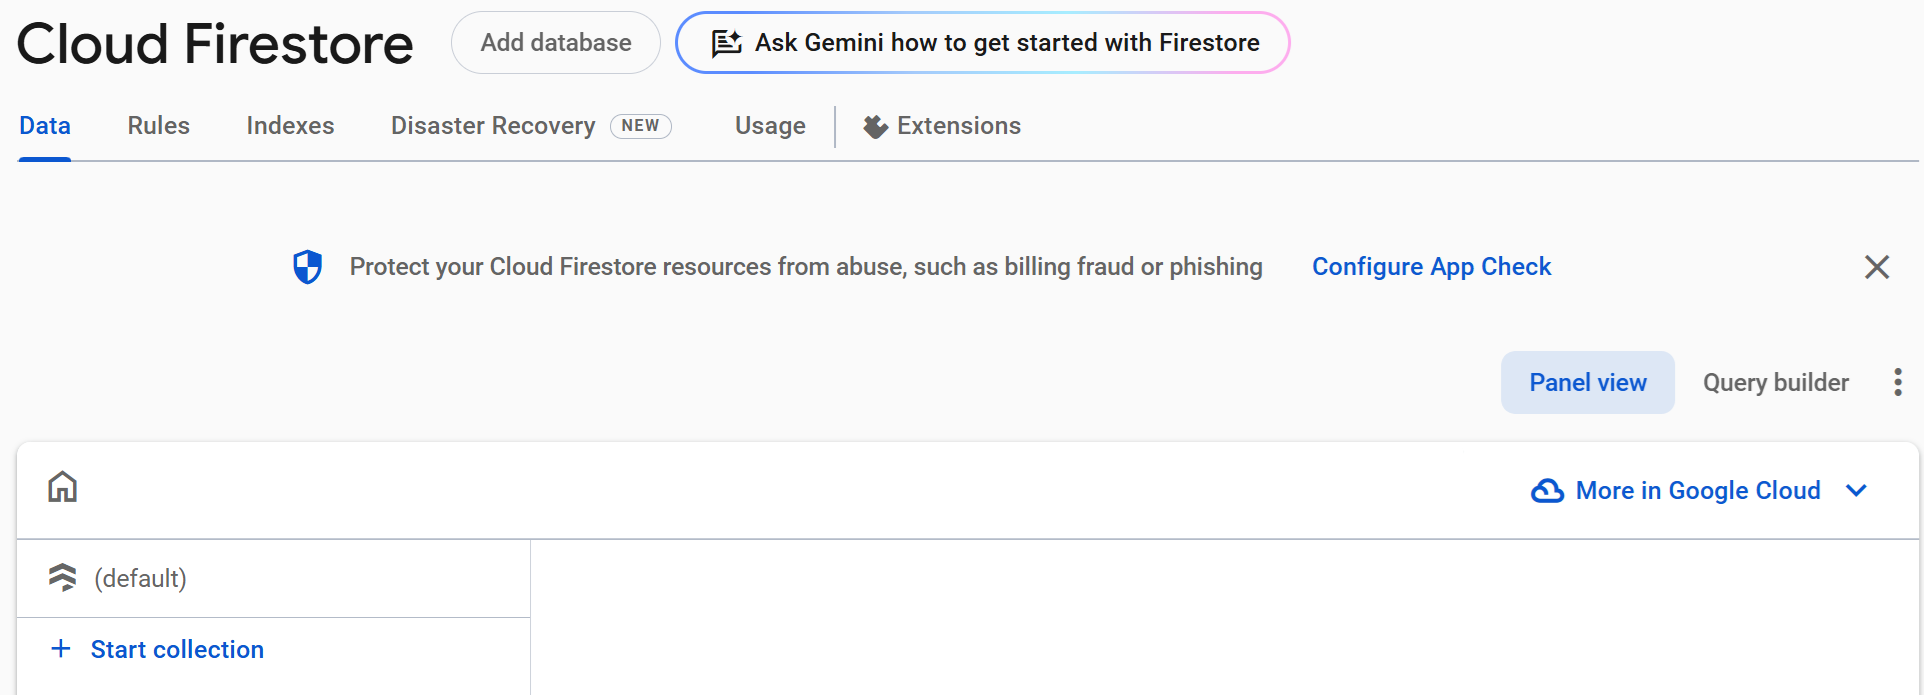
- Click the ‘Firestore database’ on the leftside menu. Then Firestore database will be on your shortcut, and you will see ‘Create database’ button on the main window.
- Set name and location, select ‘Start in production mode’ and then ‘Create’!
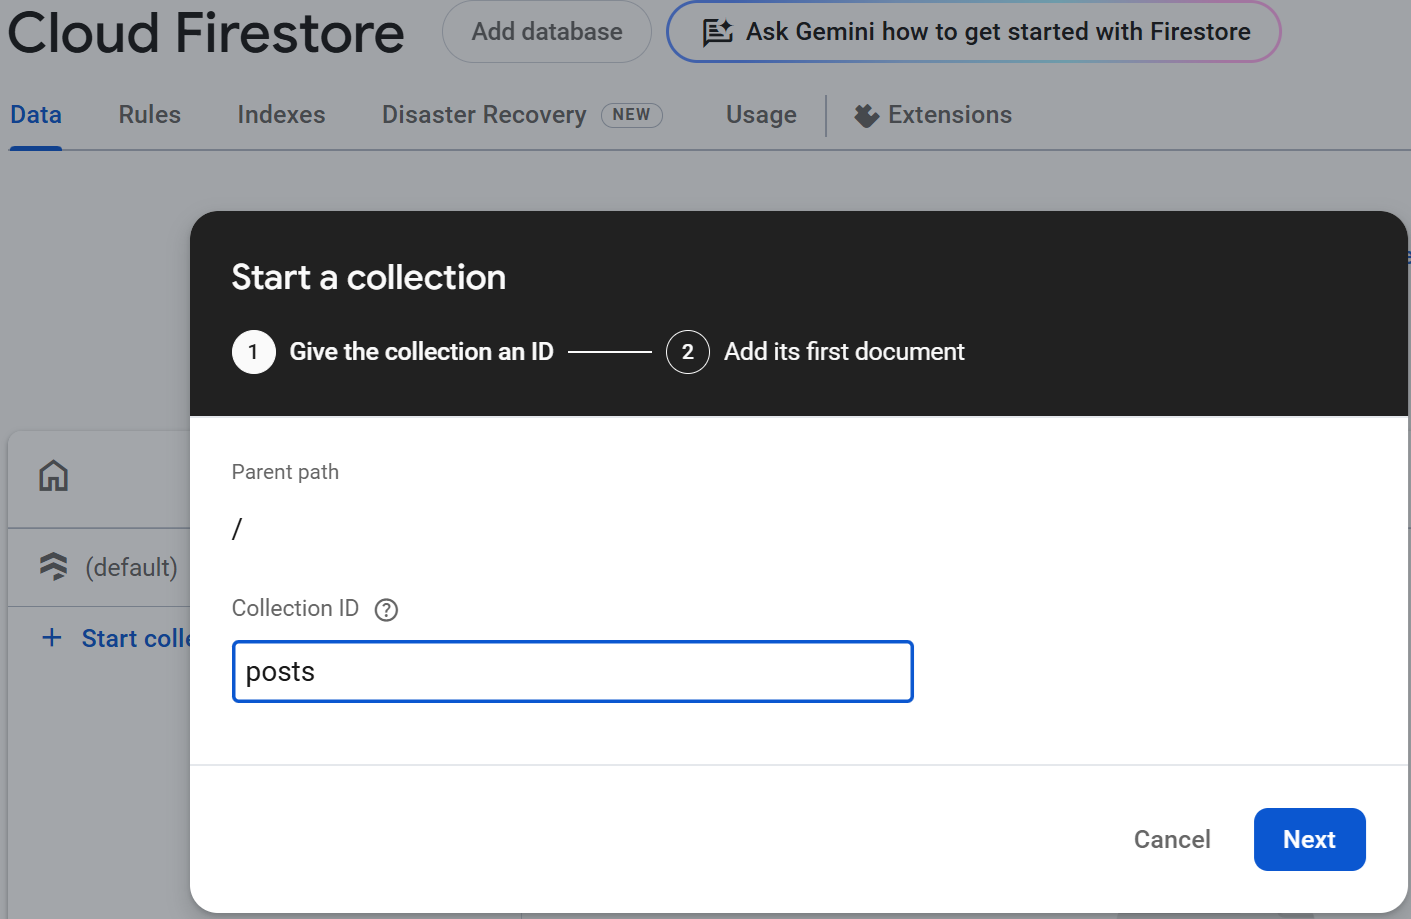
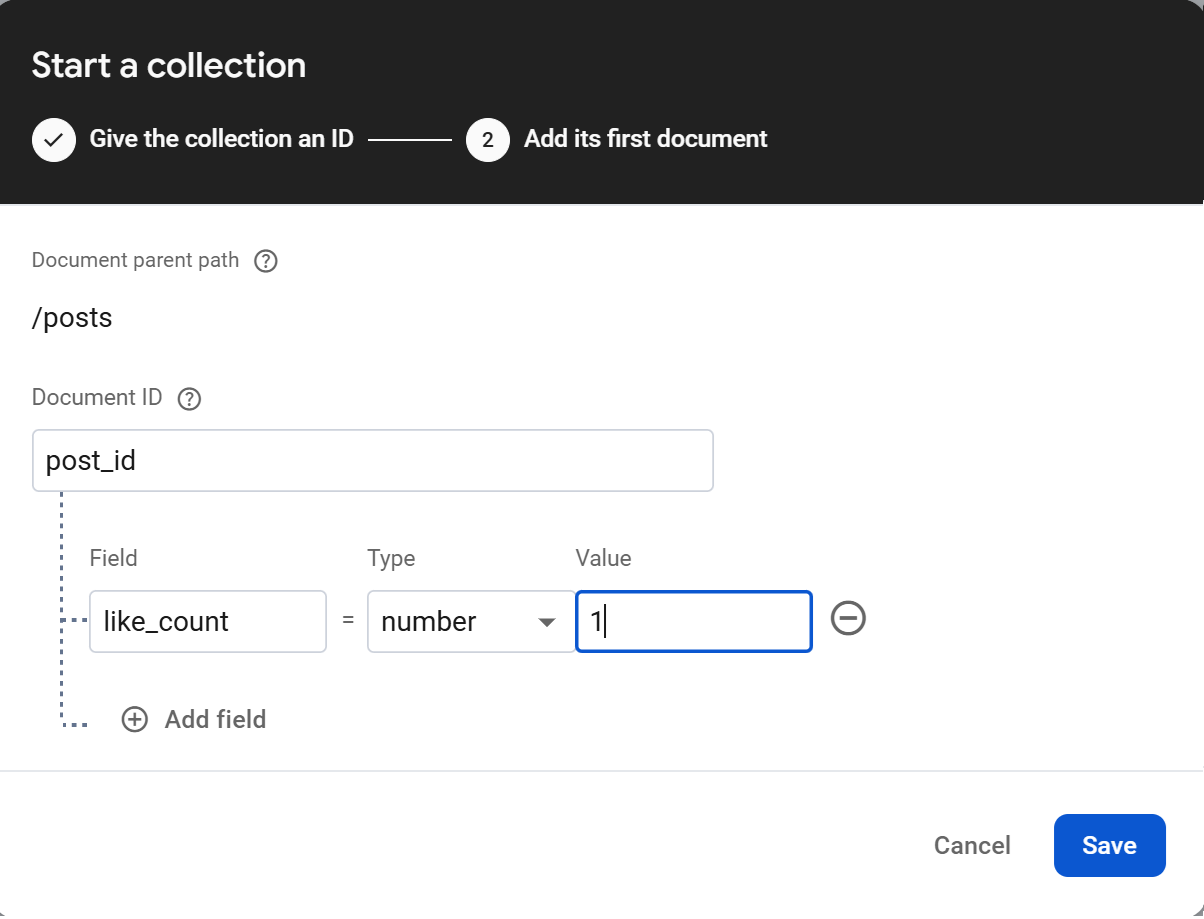
1-4. Create collection named ‘posts’, create new document with any postID, field, type and value.
Since the document is only created when the client-side script fails to find data for a specific post, the one we just created is temporary and does not serve any real purpose.
1-5. Start your app.
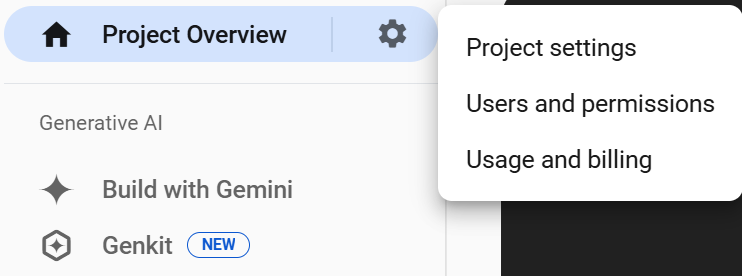
- Go to ‘Project Setting’ and click
</>-shaped button.
- Register app by setting the App nickname. No need to check the box ‘Also set up Firebase Hosting for this app.’
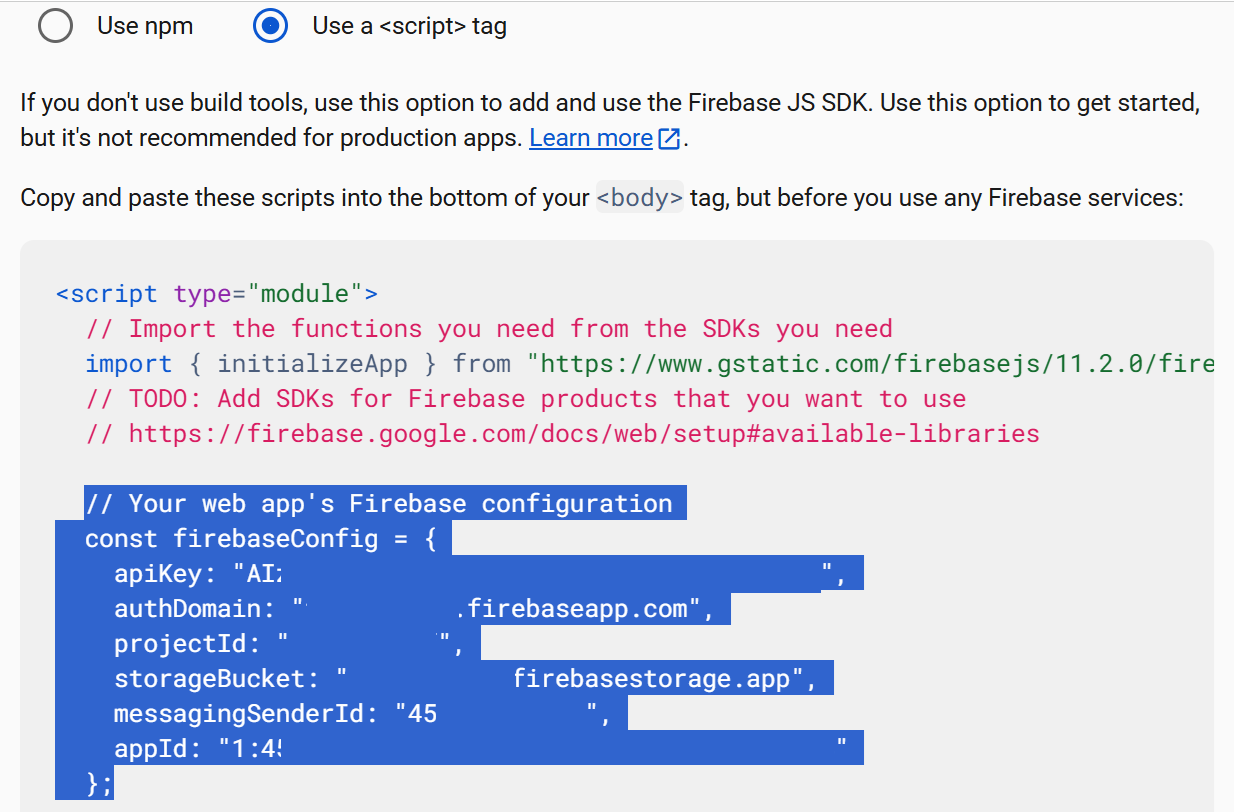
- After registering the app, you see the web app’s Firebase configuration. Copy the script and store it as JSON file in
your jekyll root folder/functions/firebase-config.json.
Click to see the json script.
{
  "apiKey": "your apiKey",
  "authDomain": "your authDomain",
  "projectId": "your projectId",
  "storageBucket": "your storageBucket",
  "messagingSenderId": "your messagingSenderId",
  "appId": "your appId",
  "measurementId": "your measurementId"
}
This config json will be used in step 3-3.
2. Post setting
In the YAML header of each post, you need to specify unique post id for the post. This is because the like count will be saved to Firestore database, associated with the post’s unique ID. This is to ensure that a like count of each post is saved separately.

3. Front-end Setting
3-1. Create HTML for the Like Button.
First, the very HTML for the like button is created and saved as _includes/likeButton.html. This file will be incorporated into your site in section 3-4.
Click to see the full HTML script
<div id="post-data" data-post-id="{{ page.id }}"></div>
<div class="placement">
    <button id="like-button" class="btn-love">
    </button>
    <span id="like-count">0</span>
</div>
<!--scss file-->
<!--<link rel="stylesheet" href="path/to/your/style.css">-->
<script src="https://www.gstatic.com/firebasejs/11.2.0/firebase-app-compat.js"></script>
<script src="https://www.gstatic.com/firebasejs/11.2.0/firebase-firestore-compat.js"></script>
<script src="/assets/scripts/fireBase.js"></script>- Retrieve
page.idvia liquid grammar. - Make button and Like Count.
- Import javascripts. The last one should be included in relevant directory in you Jekyll blog project folder, in my case
/assets/scripts/fireBase.js. - CSS can be fetched within this HTML script. Since I have earlier projects that utilize custom CSS in their way, I just followed that way. The SCSS file named
_sass/custom/likeButton.scsswas imported in_sass/custom/customOverride.scssvia@import "./likeButton.scss";, and then_sass/custom/customOverride.scsswas imported toassets/css/main.scssvia@import "custom/customOverride.scss";.
3-2. Create SCSS for the Like Button.
I created and saved SCSS for the like button, as _sass/custom/likeButton.scss. The likeButton.scss is then imported into _sass/custom/customOverride.scss by @import "./likeButton.scss";. My blog setting is that the customOverride.scss file is again imported by main.scss file via @import "custom/customOverride.scss"; such that the custom SCSS files are imported together into the main SCSS file.
The SCSS I used is from Matt Henley’s “Like” button (codepen)
Click to see the full SCSS script
.btn-love {
  width: 80px;
  height: 80px;
  //background: url("https://cssanimation.rocks/images/posts/steps/heart.png") no-repeat;
  background: url("/assets/images/liked_button.png") no-repeat;
  background-position: 0 0;
  //cursor: pointer;
  cursor: url("data:image/svg+xml;utf8,<svg xmlns='http://www.w3.org/2000/svg' width='24' height='24'><path d='M12 2C6.48 2 2 6.48 2 12s4.48 10 10 10 10-4.48 10-10S17.52 2 12 2zm5 16H7v-2h10v2zm-4.59-4.03l-1.4-1.4L10 14.17l-1.59-1.59L7 14l3 3 7-7-1.41-1.41z' fill='#4A92E2'/></svg>") 12 12, pointer;
  transition: background-position 1s steps(28);
  transition-duration: 0s;
  position: relative;

  &.is-active {
    transition-duration: 1s;
    background-position: -2800px 0;
  }
}

// Not liked yet
.btn-love:not(.is-active)::before {
  content: "Please click me! 눌러주세요!^^";
  position: absolute;
  top: -35px; /* Adjust position as needed */
  left: 50%;
  transform: translateX(-50%);
  background-color: #F1F8FF; /* 연한 파란색 배경 */
  color: #333;
  padding: 8px 12px;
  border-radius: 8px;
  white-space: nowrap;
  opacity: 0;
  transition: opacity 0.3s ease;
  pointer-events: none;
  font-size: 14px;
  z-index: 1000;
  box-shadow: 0 2px 8px rgba(0,0,0,0.1);
}

.btn-love:not(.is-active):hover::before {
  opacity: 1;
}

.btn-love:not(.is-active):hover {
  cursor: url("data:image/svg+xml;utf8,<svg xmlns='http://www.w3.org/2000/svg' width='20' height='20' viewBox='0 0 24 24'><path d='M12 21.35l-1.45-1.32C5.4 15.36 2 12.28 2 8.5 2 5.42 4.42 3 7.5 3c1.74 0 3.41.81 4.5 2.09C13.09 3.81 14.76 3 16.5 3 19.58 3 22 5.42 22 8.5c0 3.78-3.4 6.86-8.55 11.54L12 21.35z' fill='%23fb4a96'/></svg>") 12 12, pointer;
}

body {
  background: #000000;
}

.placement {
  display: flex; /* Enable Flexbox */
  justify-content: center; /* Horizontally center content */
  align-items: center; /* Vertically center content (if needed) */
  /* ... other styles ... */
}

// Change cursor shape and show tooltip if you Liked already.
.btn-love.is-active { /* Style for the liked state */
  cursor: url("data:image/svg+xml;utf8,<svg xmlns='http://www.w3.org/2000/svg' width='24' height='24'><path d='M12 2C6.48 2 2 6.48 2 12s4.48 10 10 10 10-4.48 10-10S17.52 2 12 2zm5 16H7v-2h10v2zm-4.59-4.03l-1.4-1.4L10 14.17l-1.59-1.59L7 14l3 3 7-7-1.41-1.41z' fill='#4A92E2'/></svg>") 12 12, no-drop; /* Custom cursor */
}

.btn-love.is-active::before { /* Tooltip styles */
  content: "Thank you for your Like!! :) 눌러주셔서 고맙습니다!! :)";
  position: absolute;
  top: -30px; /* Adjust position as needed */
  left: 50%;
  transform: translateX(-50%);
  background-color: rgba(83, 165, 255, 0.8);
  color: white;
  font-size: 14px;
  padding: 5px 10px;
  border-radius: 5px;
  white-space: nowrap; /* Prevent tooltip from wrapping */
  opacity: 0; /* Initially hidden */
  transition: opacity 0.3s ease; /* Smooth transition */
  pointer-events: none; /* Prevent tooltip from blocking clicks */
  box-shadow: 0 2px 8px rgba(0,0,0,0.1);
}

.btn-love.is-active:hover::before { /* Show tooltip on hover */
  opacity: 1;
}

.btn-love.is-active:active::before { /* Keep tooltip shown on click */
  opacity: 1;
}- Resize accordingly.
- Image used is stored in
/assets/images/liked_button.png. - When you click the button, like count is stored in the database, and then
is-activeclass added to the button, where it shows animation. is-activeclass button will have its special cursor, ‘prohibit’ shape that prevent further clicking. It also shows tooltip saying “Thank you for your Like!! :)”. You can customize these details.
3-3. Create Firebase Function.
We will use Firebase function for fetching Firebase configuration information. This is to ensure that Firebase config is not directly exposed to your javascript file. Key concept here is to retrieve the JSON file of your Firebase config for Firebase initiation, using Firebase function. The following prerequisites are detailed in Firebase CLI documentation.
(Prerequisite)
1. Node.js should be installed in your computer.
2. Firebase CLI should be installed. You may use npm install -g firebase-tools.
3. Subscribing Blaze plan is needed to use Firebase Functions. You won’t be charged if usage amount is within no-cost quota.
4. In your jekyll root folder, log-in to Firebase via firebase login. If successful, you can use firebase projects:list to see your projects.
First, initiate a Firebase project in your Jekyll root folder via firebase init in your command-line. Select ‘function’ for your app as instructed, and then choose the existing Firebase project you created earlier. After this, you’ll have functions folder in the Jekyll root folder with index.js included. This index.js will have the following script.
Click to see the full JS script
// Make sure you DEPLOY function after changing this script.
const functions = require('firebase-functions');
const admin = require('firebase-admin');
const fs = require('fs');
const path = require('path');
const cors = require('cors')({
  origin: [
    'http://localhost:4000', // Replace with your Jekyll site's origin.
    'https://gaba-tope.github.io'
  ],
});

admin.initializeApp();

exports.getFirebaseConfig = functions.https.onRequest((req, res) => {
  const configFilePath = path.join(__dirname, 'firebase-config.json');
  try {
    cors(req, res, () => {
        const configData = fs.readFileSync(configFilePath, 'utf8');
        res.json(JSON.parse(configData));
      });
    //const configData = fs.readFileSync(configFilePath, 'utf8');
    //res.json(JSON.parse(configData));
  } catch (error) {
    console.error('Error reading config file:', error);
    res.status(500).send('Error reading configuration');
  }
});
Then, deploy this function in your command-line via firebase deploy --only functions. If you see errors, run the function in emulator first via firebase emulators:start --only functions and open your function URL.
3-4. Create JavaScript for the Like Button.
Next, create assets/scripts/fireBase.js as follows. The button click javascript is inspired from Matt Henley’s “Like” button (codepen).
Click to see the full JS script
// Initialize Firebase (add your config)
//console.log("fireBase.js loaded"); // for debug
import { initializeApp } from "https://www.gstatic.com/firebasejs/11.2.0/firebase-app.js";
import { getFirestore } from "https://www.gstatic.com/firebasejs/11.2.0/firebase-firestore.js";

fetch('https://us-central1-like-button-88f77.cloudfunctions.net/getFirebaseConfig')
  .then(response => response.json())
  .then(config => {
    firebase.initializeApp(config);
    const db = firebase.firestore();
    // console.log("Firebase initialized, Firestore instance:", db); // for debugging

    // Get the post ID (replace with your Jekyll logic)
    const postData = document.getElementById('post-data');

    if (!postData) {
      console.error("postData element not found!");
      return; // Stop execution if the element doesn't exist
    }

    const postId = postData.dataset.postId; // Get from data attribute

    const likeCountElement = document.getElementById('like-count');
    const likeButton = document.getElementById('like-button');

    // For Debug: check if the two elements are found.
    // if (!likeCountElement) {
    //   console.error("likeCountElement not found!");
    // } else {
    //   console.log("likeCountElement found.")
    // }
    // if (!likeButton) {
    //   console.error("likeButton not found!");
    // } else {
    //   // console.log("likeButton found.")
    // }

    const postRef = db.collection('posts').doc(postId);

    // Get initial like count (important!)
    postRef.get().then((doc) => {
      if (doc.exists) {
        likeCountElement.textContent = doc.data().likeCount;
      } else {
        likeCountElement.textContent = 0; // Set to 0 if no likes yet
      }
    }).catch((error) => {
        console.error("Error getting initial like count: ", error);
    });

    // Function to update the like count in the database
    function updateLikeCount(postId) {
      const db = firebase.firestore();
      const postRef = db.collection('posts').doc(postId);

      // Transaction to prevent race conditions (important!)
      db.runTransaction(async (transaction) => {
        const doc = await transaction.get(postRef);

        if (!doc.exists) {
          // If the document doesn't exist, create it with a likeCount of 1
          await transaction.set(postRef, { likeCount: 1 });
          return 1; // Return the new like count
        } else {
          const newLikeCount = doc.data().likeCount + 1;
          await transaction.update(postRef, { likeCount: newLikeCount });
          return newLikeCount; // Return the updated like count
        }
      })
      .then((newLikeCount) => {
        likeCountElement.textContent = newLikeCount; // Update the display
        likeButton.disabled = true; // Disable the button
        // Store that the user has liked the post (e.g. in local storage)
        localStorage.setItem(`liked-${postId}`, 'true');

      })
      .catch((error) => {
        console.error("Error updating like count: ", error);
      });
    }

    // Function to check if the user has already liked the post
    function checkIfLiked(postId) {
      const hasLiked = localStorage.getItem(`liked-${postId}`);
      return hasLiked === 'true';
    }

    if (checkIfLiked(postId)) {
      likeButton.classList.add('is-active'); // Add 'is-active'class if already liked, s.t. button filled with red.
      likeButton.disabled = true; // Disable if already liked
    }

    // Add the like button click listener
    likeButton.addEventListener('click', () => {
      if (!likeButton.classList.contains('is-active')) {
        likeButton.classList.add('is-active'); // Add 'is-active' class immediately
        updateLikeCount(postId);
      }
    // If you want to implement the unlike function, you must uncomment it and handle the unlike logic in your Firebase database
    // else {
    // likeButton.classList.remove('is-active'); // Remove 'is-active' class
    // }
    });

    // ... rest of your Firebase code
  })
  .catch(error => {
    console.error('Error fetching Firebase config:', error);
  });
This is the core functionality of Like button action. Below is the brief explanation of the code.
fetch('your function URL')will fetch the Firebase function.- Then Firebase config will be assigned to
config, as infirebase.initializeApp(config);. - Define
dbas your Firestore database. - Function
updateLikeCountupdate the like count of the post specified by post ID.- Firestore transaction was used to ensure that the like count is updated reliably, even if multiple users try to ‘like’ the post simultaneously. Transactions prevent race conditions where data could be corrupted by concurrent updates.
- If there is NO existing document of that post ID (
if (!doc.exists) {... }), it creates the document of the post ID with a likeCount of 1. - If there is existing document (
else {... }), it will add 1 to the existing likeCount. - Update the display after creating document of one likeCount or adding one likeCount to existing likeCount value.
return newLikeCount;: The transcation return the updated likeCount.- Disable the button and save this record to client’s local storage to prevent multiple ‘like’ing.
- function
checkIfLiked(postId)checks if the client already ‘liked’ the post by referring to a local storage.- If the post was already ‘liked’, then
is-activeclass is added to the button and the button is disabled.
- If the post was already ‘liked’, then
- Call the
likeButton.addEventListener. Ifis-activeisn’t added to the button at the moment when the button is clicked, add theis-activeclass to the button and callupdateLikeCountfunction.
3-4. Incorporate the HTML into your site.
Now is the time to incorporate likeButton.html to your site. I embedded the HTML to _includes/article-footer.html like the following script. A file to embed likeButton.html depends on your directory and theme. You don’t need to include the if page.applause_button, as it’s byproduct of another feature.
Click to see the full HTML script
 <!---like Button-->
  {% if page.applause_button %}
    <div class="like_button"> {% include likeButton.html %} </div>
  {% endif %}
Conclusion
I really need to learn essential JavaScript and CSS knowledge to run my small blog… It was quite challenging, but I’m proud to have successfully made a beautiful heart-shaped like button as you can see below. I also learned that debugging with console.log(); is quite useful in javascript.
Hope this post inspires you to experiment with CSS and JS to create elements for your own blog.
More secure ways should be implemented such as using Firebase cloud function. As far as I know, using Firebase Cloud Functions allows you to implement server-side functions to restrict client’s access to data, enhancing the security of your blog.
Reference
- ‘like button for posts in jekyll’ by prashantgpt91 is the very post I was inspired to implement Like button in my blog using Firebase.
- David Kirchhoff’s Creating a like button with Firebase post did the similiar project. It helped me understand the overall strategy.
- 林宏’s Self-host comments using in Jekyll, powered by Firebase real-time database: Idea itself is the same. I also got interested in comments feature using Firebase after reading their post.
- Firebase document for more information about Firebase.
